
What’s cooler than cool? Ice cold! This experiment for preschoolers (and their thoroughly interested adult counterparts) is something you’ve really got to try, if you haven’t already. Where we live in the Gulf Islands, temperatures low enough to freeze the lakes haven’t happened in decades. With the extended cold snap we experienced recently, the lakes froze. Last weekend it seemed like every person on our island went to skate at Cusheon Lake, taking advantage of rare occasion, and every child at our preschool the following Monday had been out on the ice. It seemed like the perfect timing to introduce a cool preschool science experiment that would help us investigate and learn more about the ice we had all enjoyed playing on.
This experiment was inspired by this article on The Artful Parent, after a serious Pinterest session searching for light table ideas.
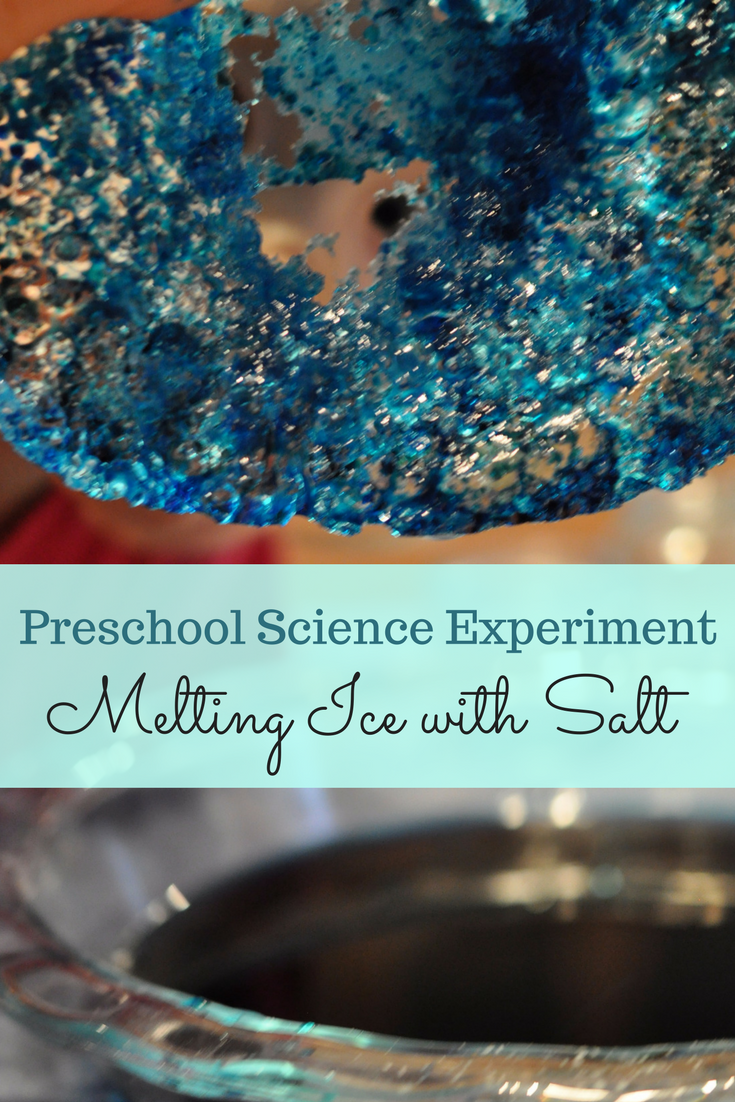
Salt helps to melt ice because it lowers the melting point of the ice to be able to melt at a lower temperature. This is how I explain the concept to my preschoolers: Ice is water that is frozen. That means it got so cold that it stopped moving and sloshing around. When ice warms up, it melts back to liquid water again. Ice melts faster when salt is touching it, because it makes the water not need as much heat to melt.

Ice – Any size and shape. We used water frozen in old plastic food containers, and also regular ice cubes and muffin tray ice pucks in the second experiment.
Dishes or trays to hold the melting ice
Salt – Apparently the chunkier stuff works best, but we opted for easy-to-find and inexpensive table salt
Pipettes – You can find inexpensive plastic pipettes on Amazon here (affiliate link), or check your local art store.
Colour – Either food colour or liquid watercolours. We used these preschool liquid watercolors in the second experiment. There are also some very neat edible and non-toxic dyes and other art supplies from Wee Can Too Art Supply. (Affiliate links)
Containers for the diluted colours – Small, clear glass jars (like babyfood jars) work well.
Disclosure: Affiliate link below
With one or more 3-year-olds around every day, I have plenty of opportunities to try experiments at home before I set up a larger scale experiment at preschool. The day we tried melting ice with salt the first time, we had our childcare swap friend with us, so we all shared in the fun.
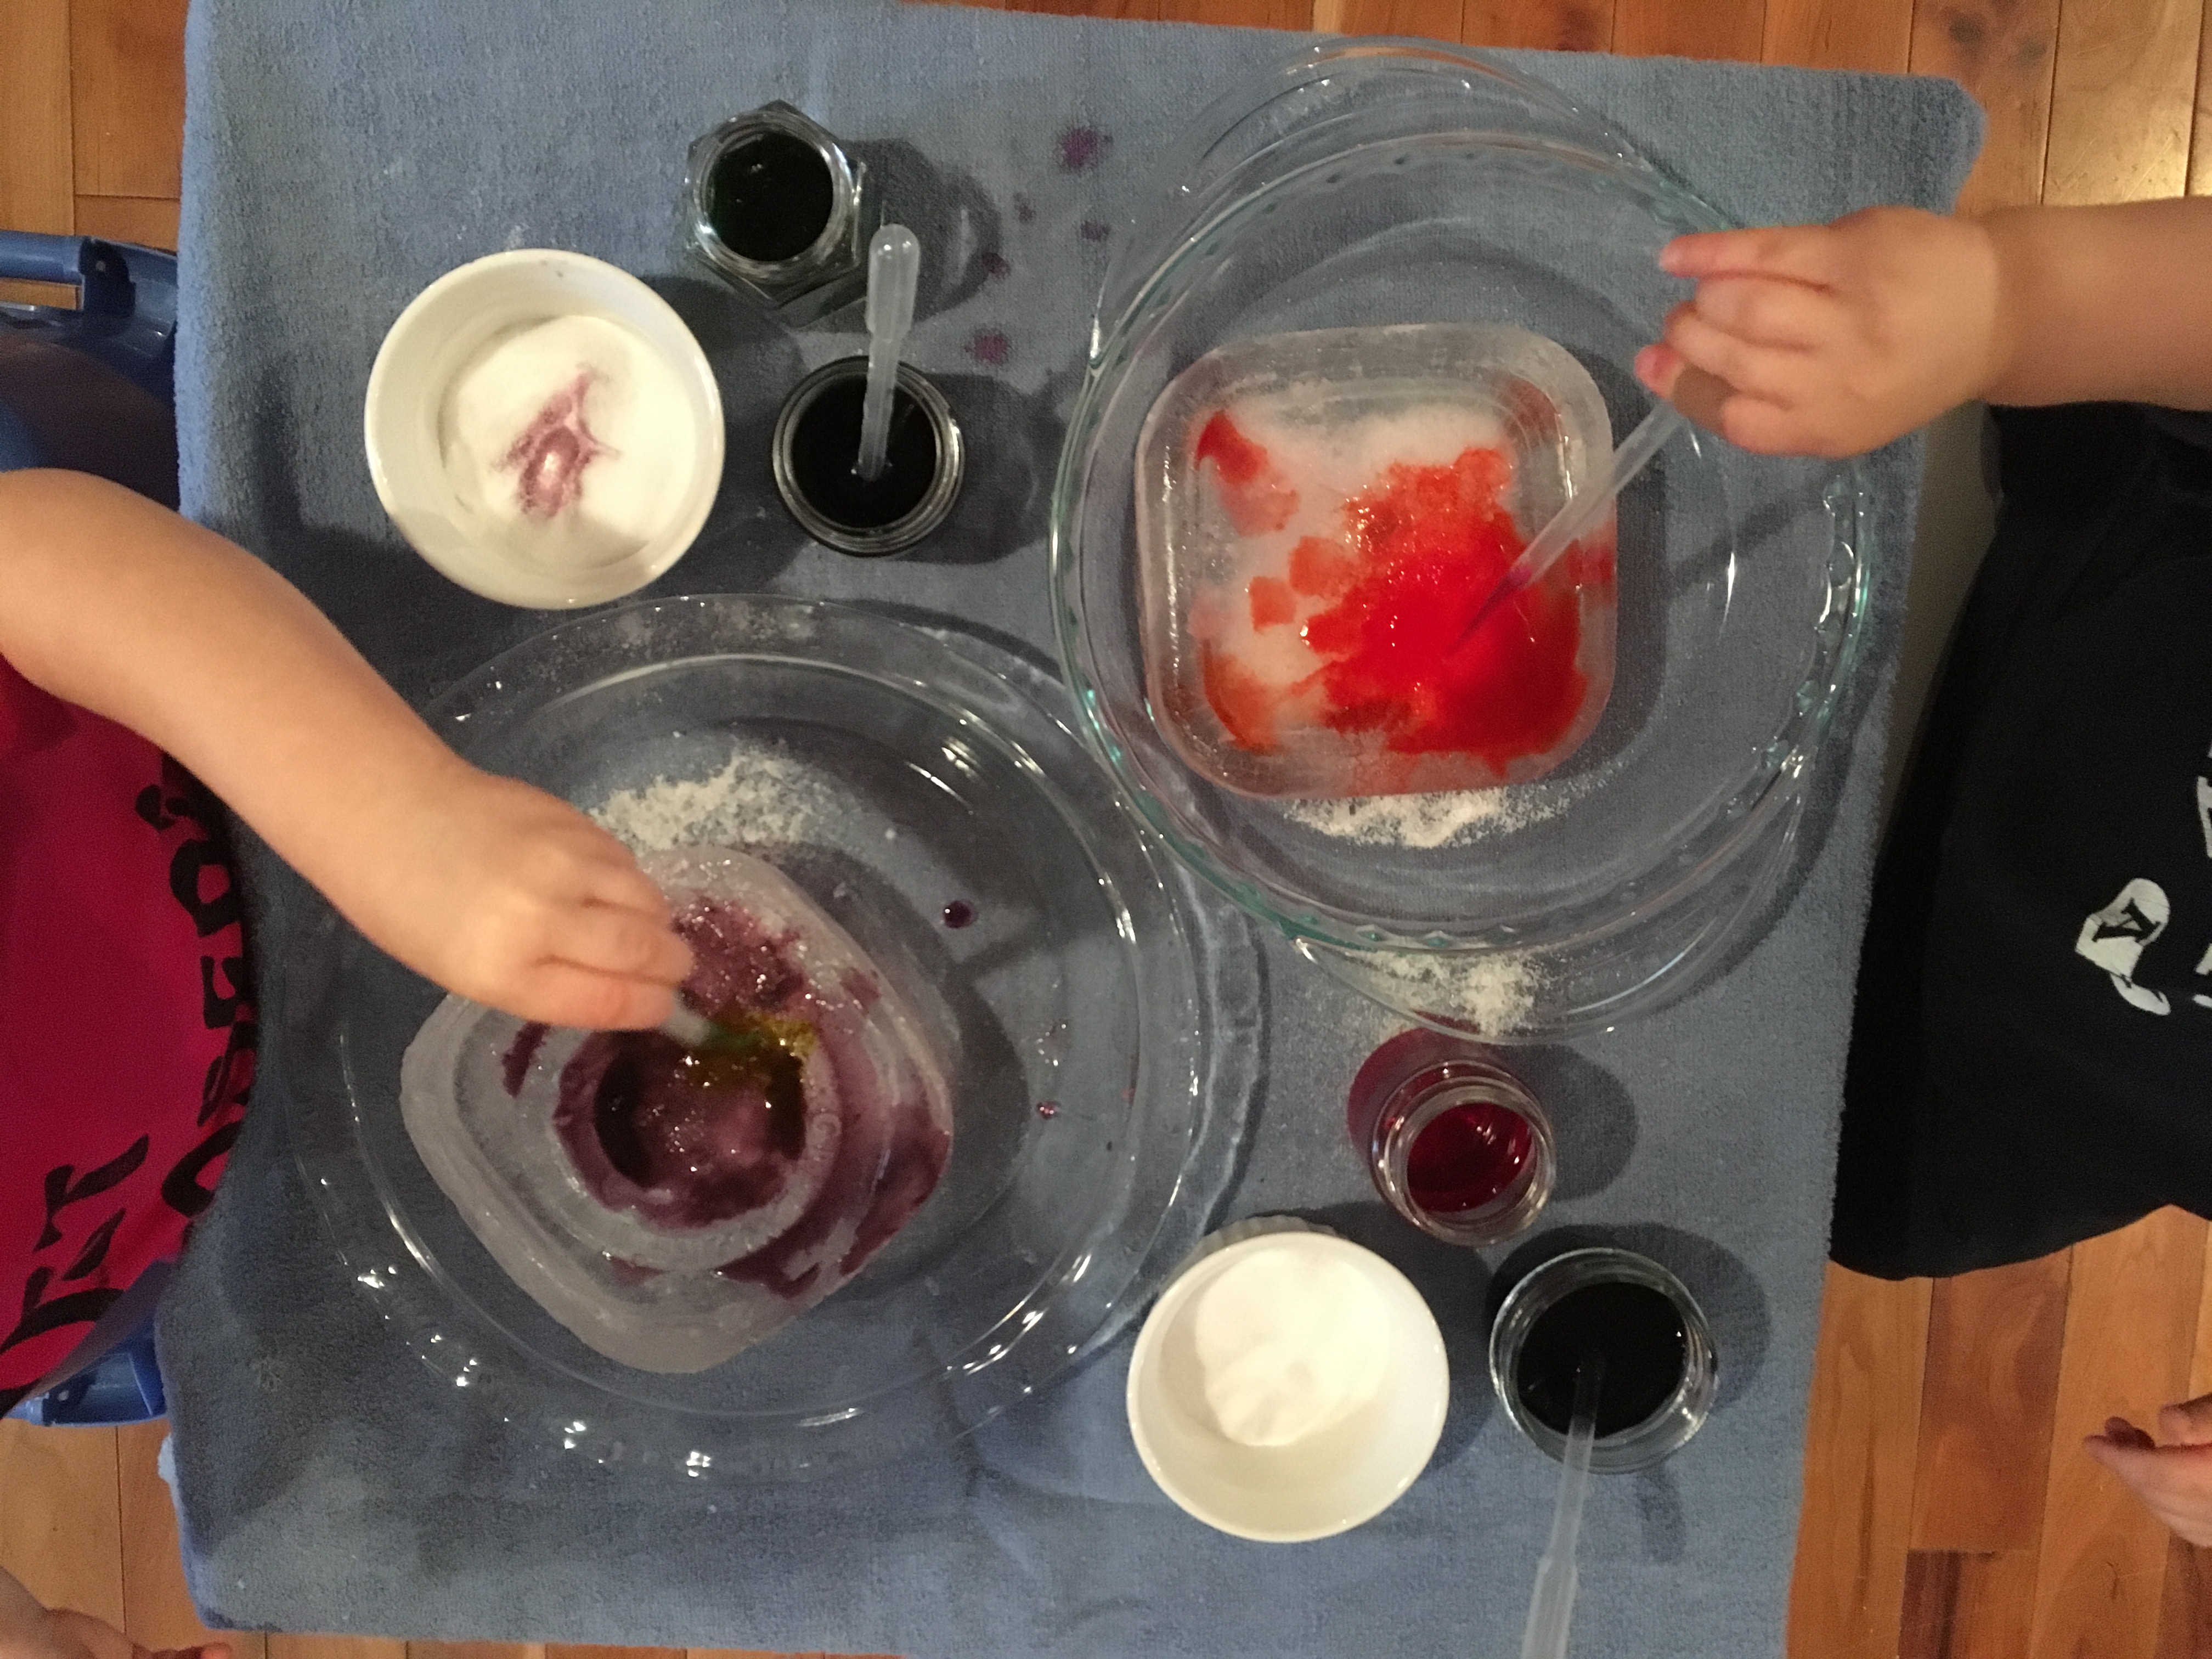
I pulled out our kiddie table into the middle of the room, giving ample room for accidental food dye splashes, and lay out an old towel to cover the table. I placed a glass pie plate for each child on the table, filled up the small jars with different colours of diluted “Neon” food dye, but left them on the counter. I then placed an ice block in each child’s dish, and let them touch and explore the ice for a few minutes. My daughter just had to touch her tongue on the ice.

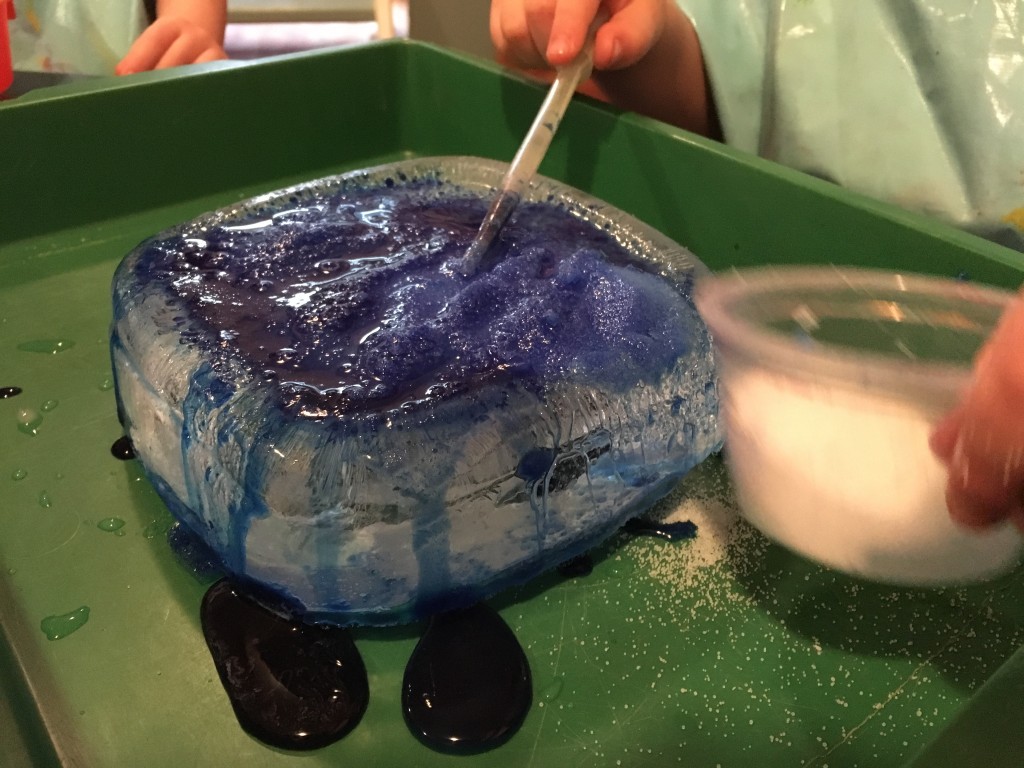
I explained the experiment, then gave them each a ramekin of salt to use their fingers to pinch or pour the salt onto their ice. After giving time to sprinkle some salt, we started using the pipettes to drop colour onto the ice and salt.
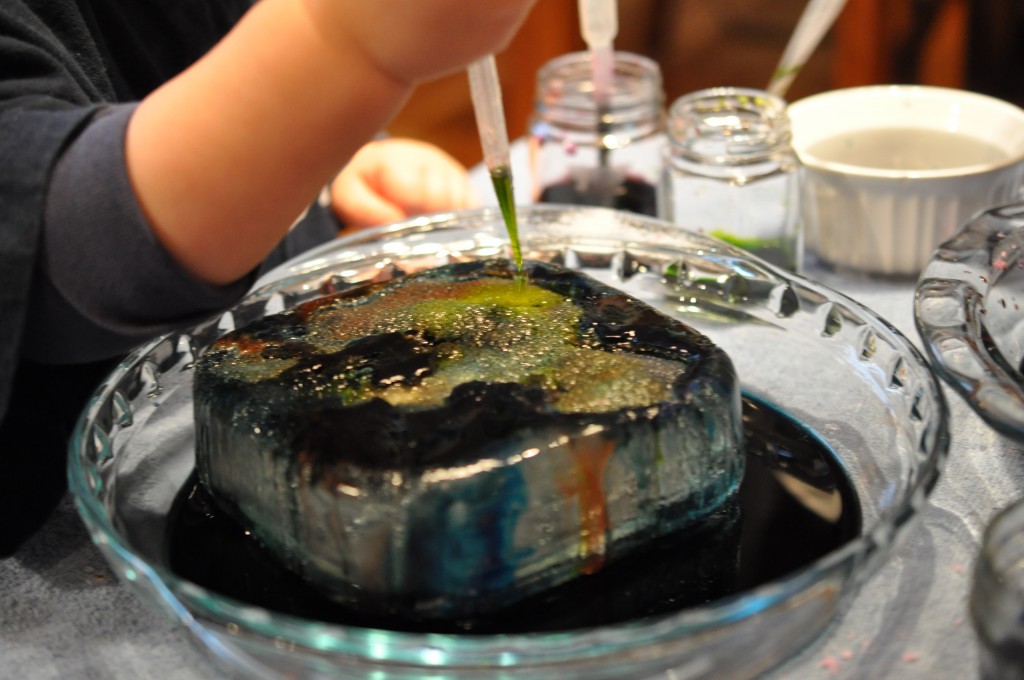
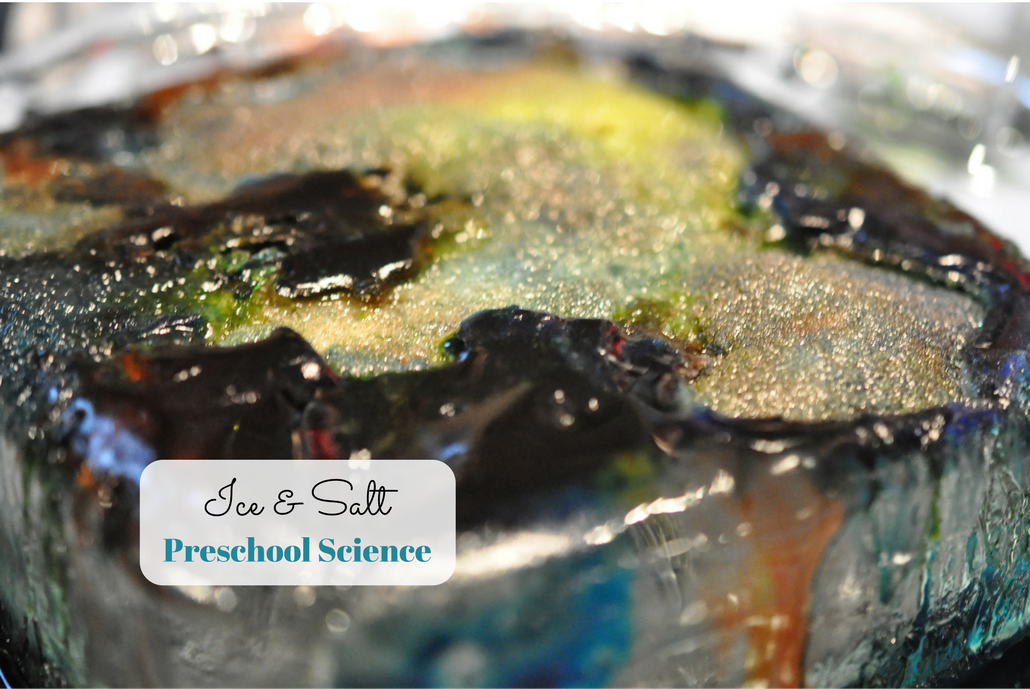
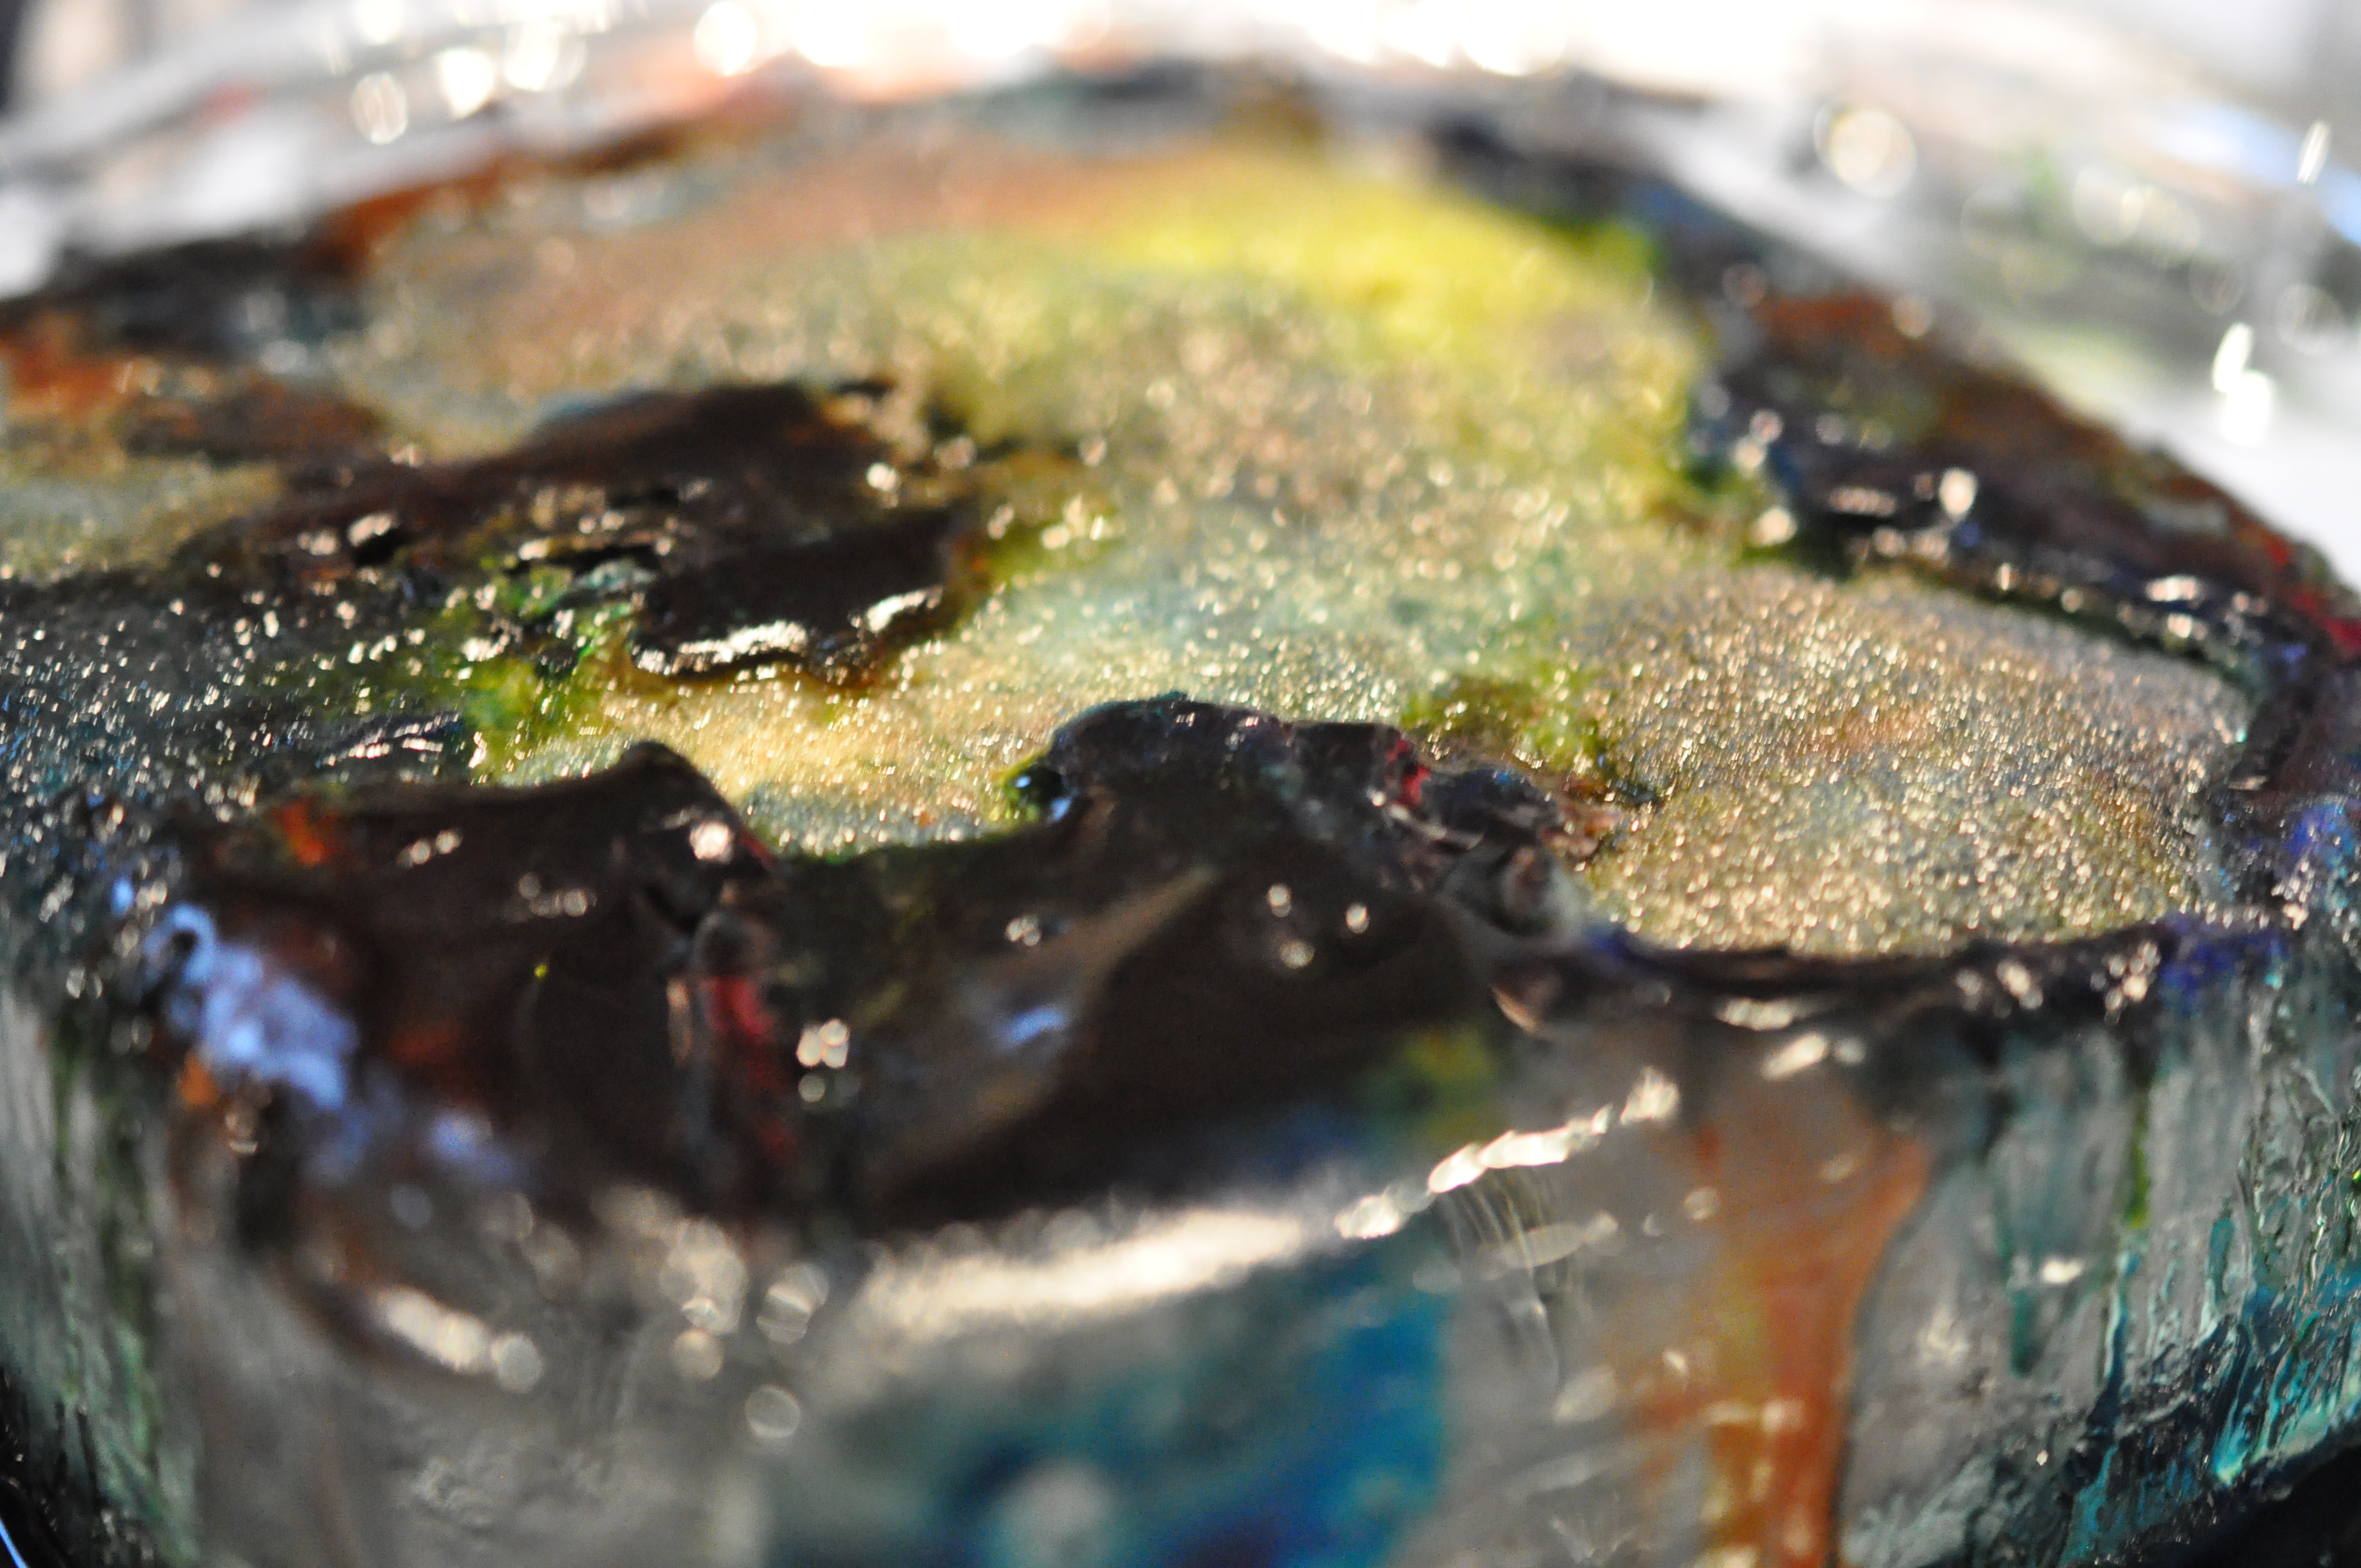
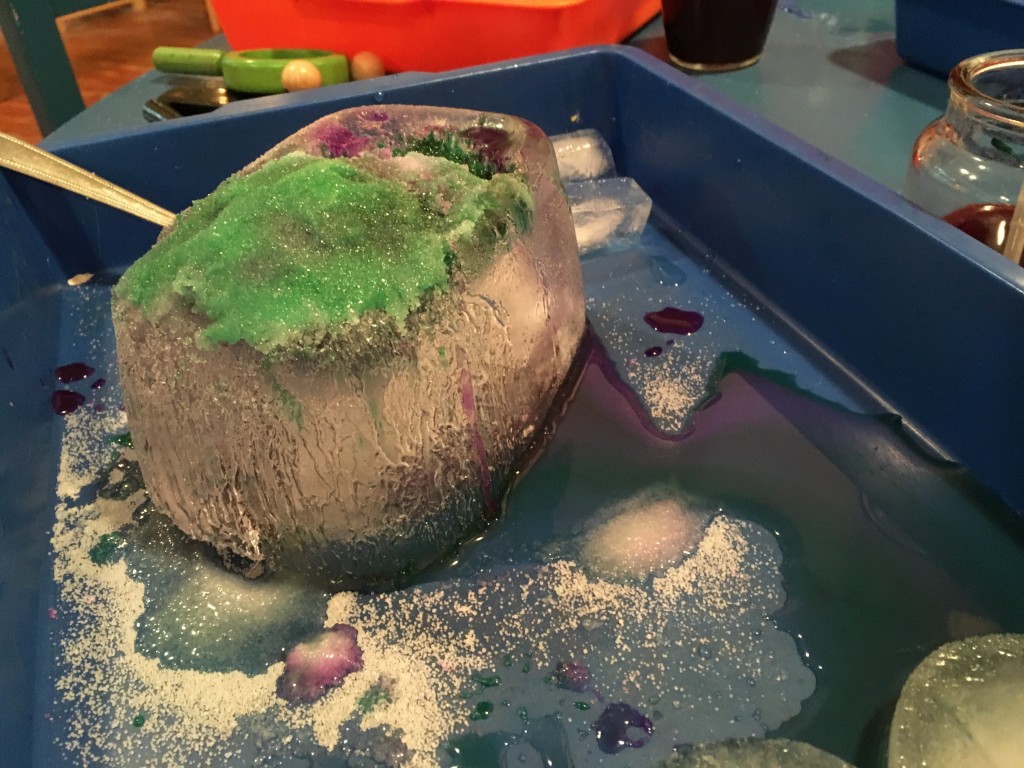
We found that the salt quickly turns into a solid (but breakable) mass, which sits on the ice and “eats away” at the ice where it touches. We would let the salt chunks stay for a time, then dig them out to check what was happening, and pour more salt in the same or new spaces.
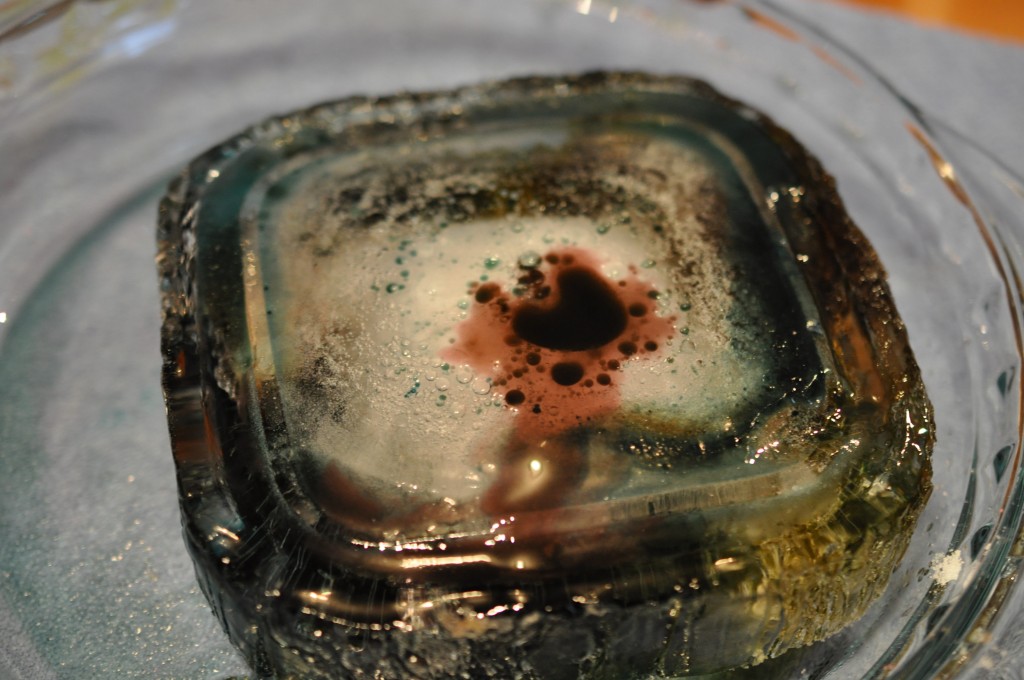
For a while it almost seemed like it was going to be a “painting the ice” activity, but once things got going with the ice melting, things got really “cool”. Both of the children stayed intently engaged, decorating and investigating the ice and salt, for an hour. An hour, people! If you haven’t met a three-year-old before, that’s a very long time to stay engaged in anything. I was impressed.
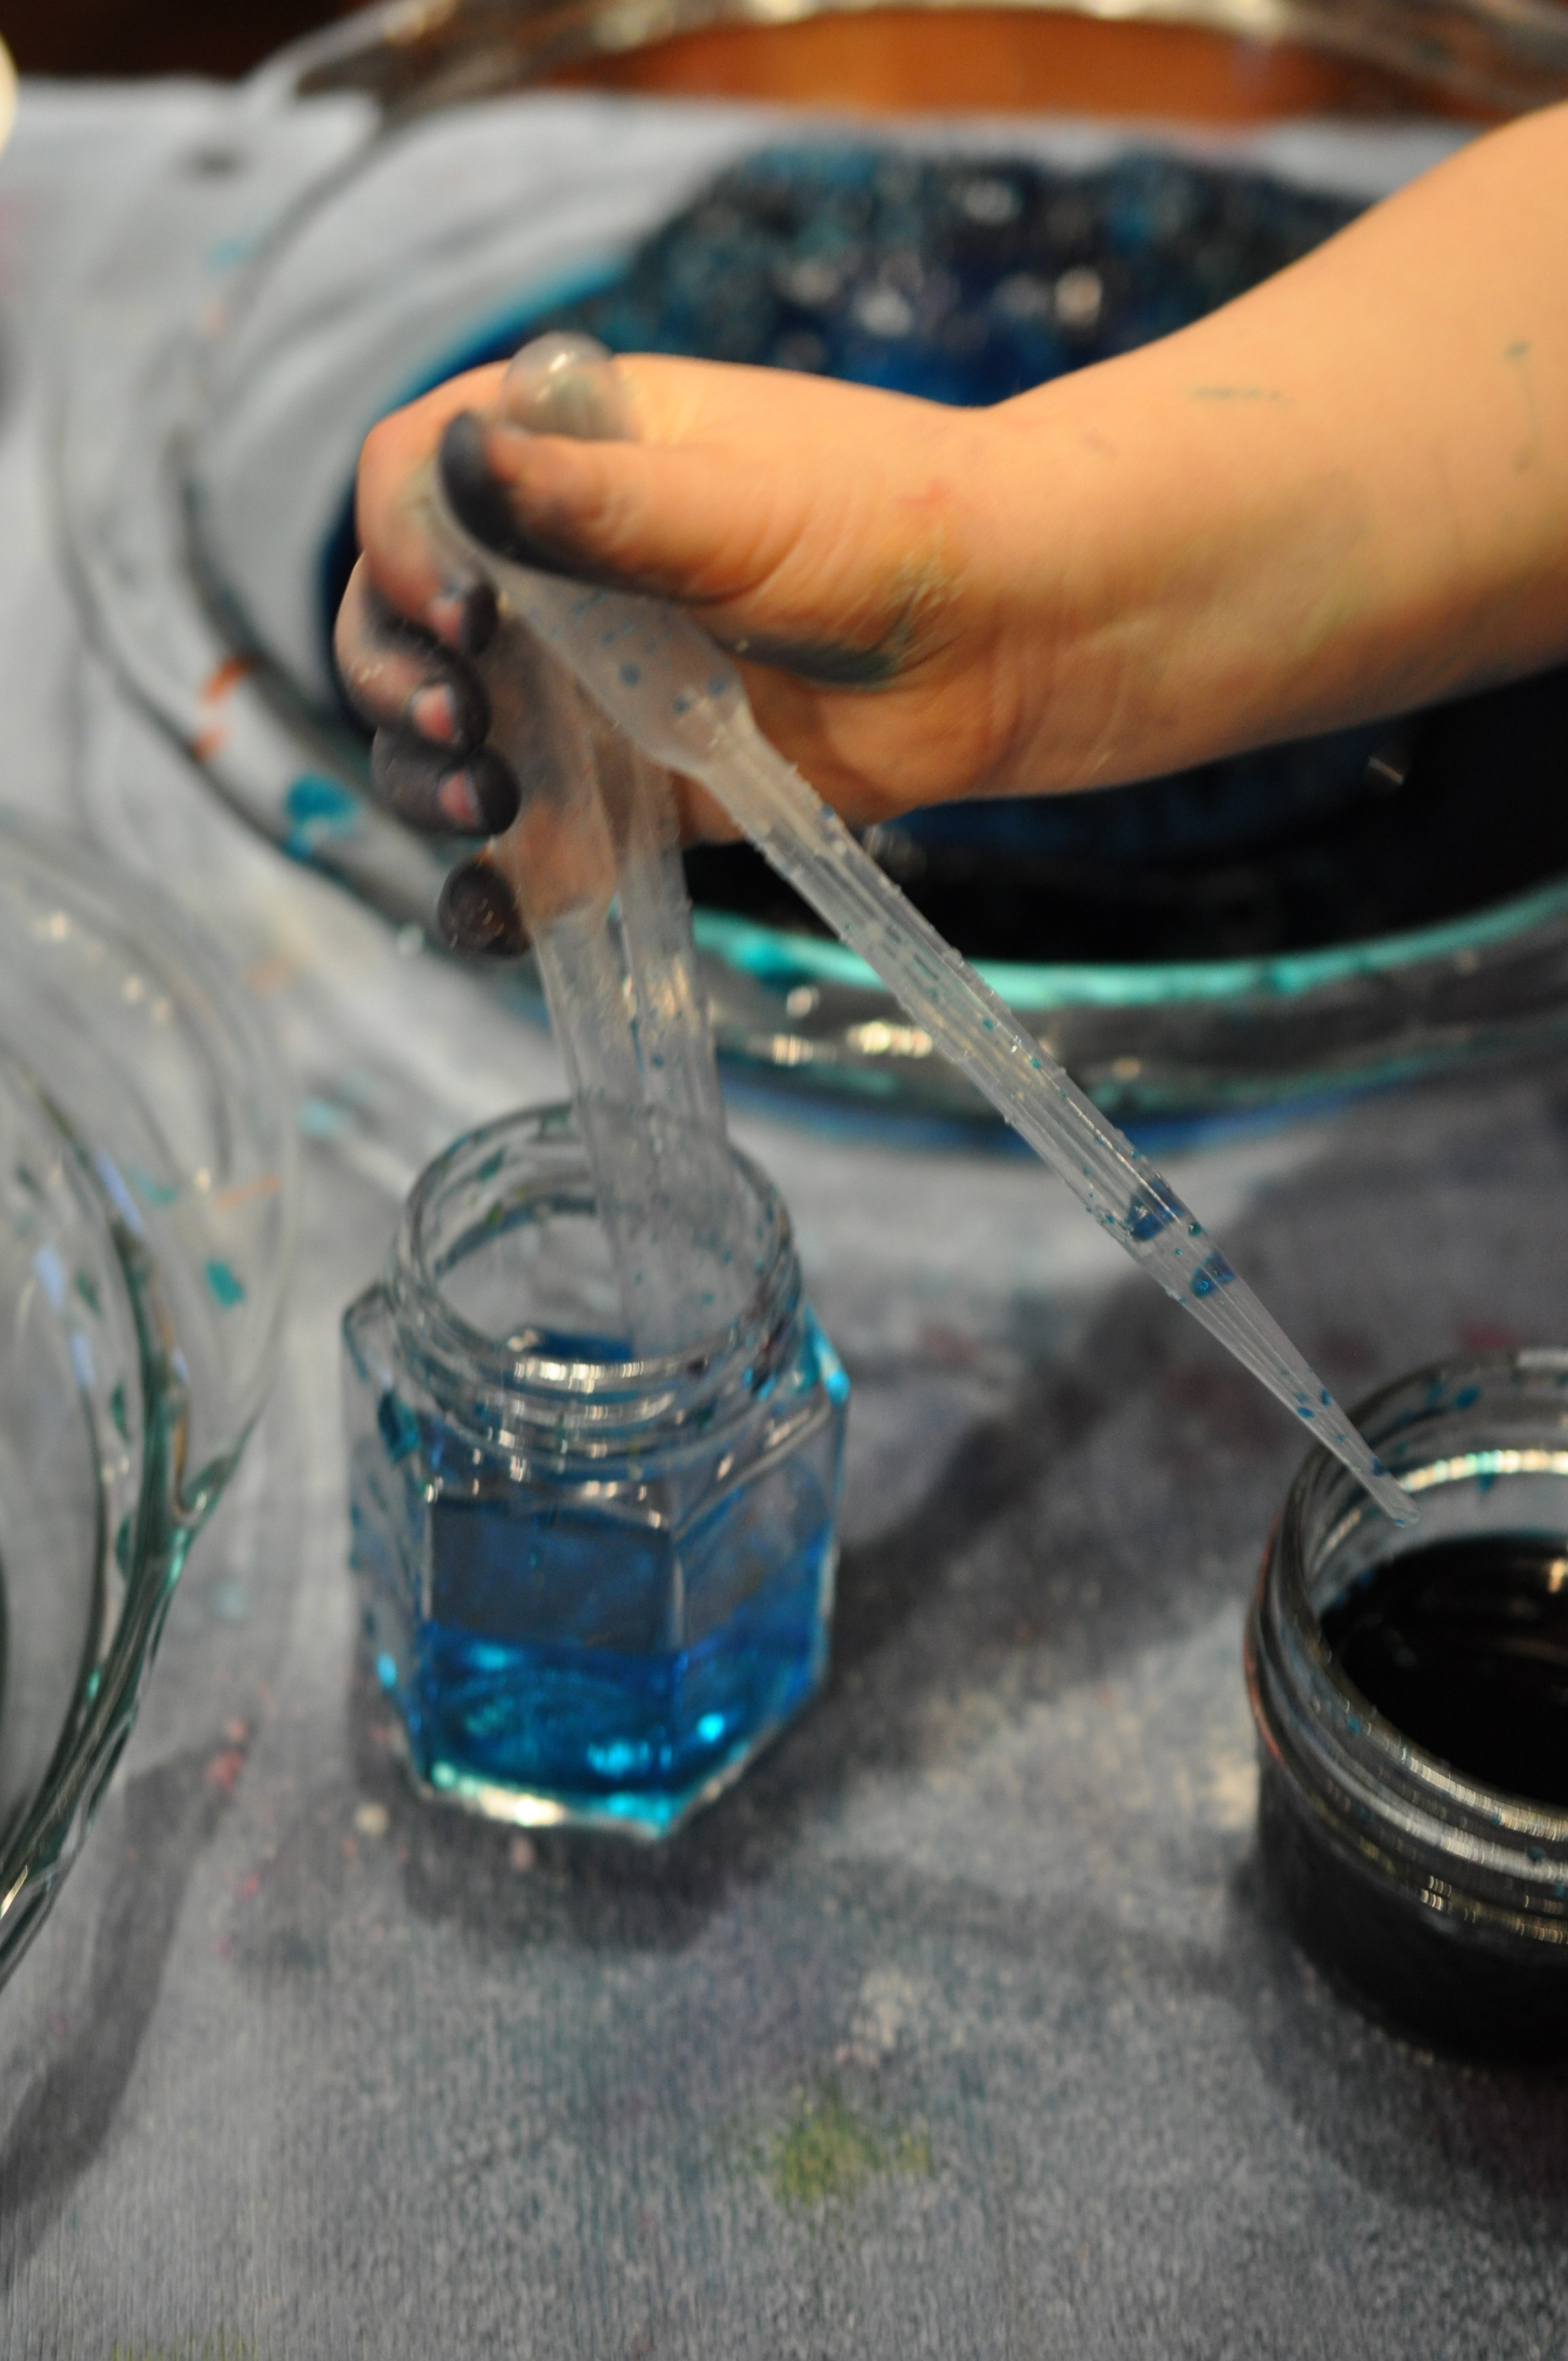
The chance to use the pipettes was fully engrossing for the little ones, and offered an opportunity to work on fine motor skills and building the tiny muscles that are a necessary precursor to writing. Later on in the experiment my Z, familiar with these tools from past activities, challenged herself to use multiple pipettes at a time.
I was glad that I had given the kids some of my old t-shirts to wear while we experimented with the food dyes. My very hands-on daughter ended up with some very blue fingers, but a little bit of soap and water washed most of it off immediately, and the rest came off the next day.

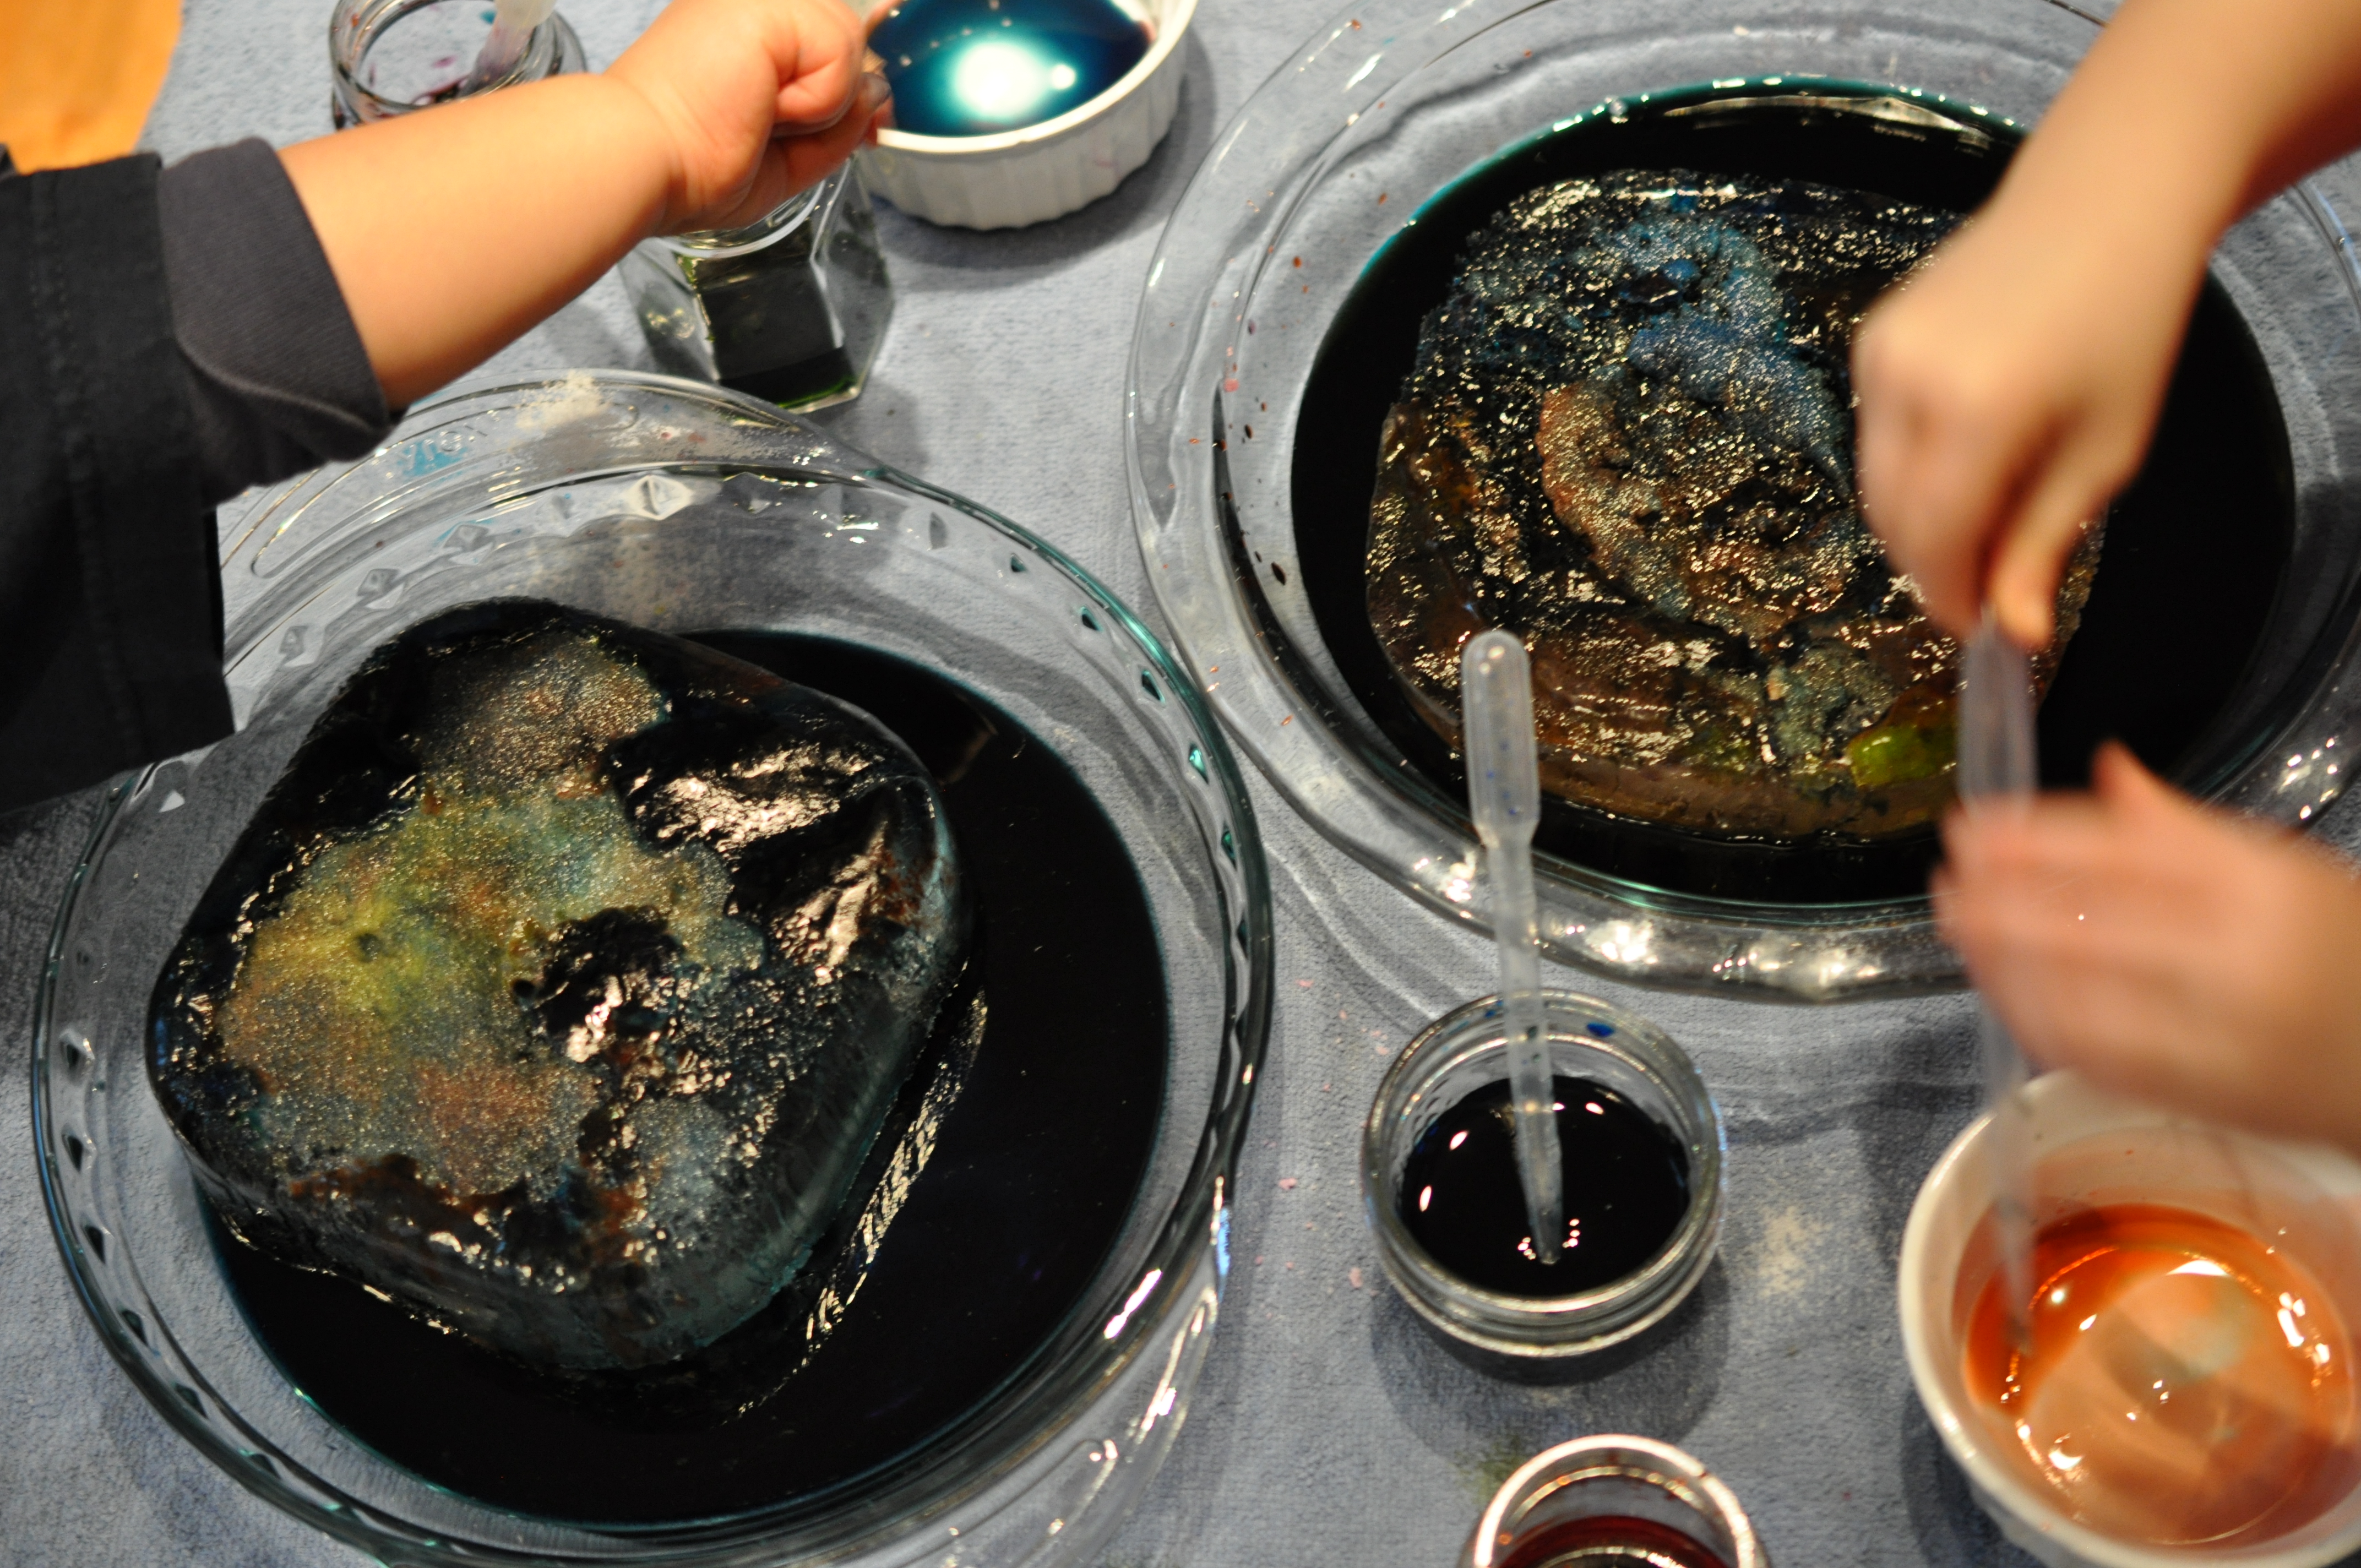
The next day I carted a cooler full of ice blocks to preschool, to try the activity in a new space, with other children, and different supplies. I set out plastic coloured trays to hold the ice, repurposed applesauce containers for salt, and small glass jars of diluted liquid watercolour (not food colour this time), with pipettes.
This experiment was very similar to the first time, with some slight additions and, of course, different children with their own original ideas to share.
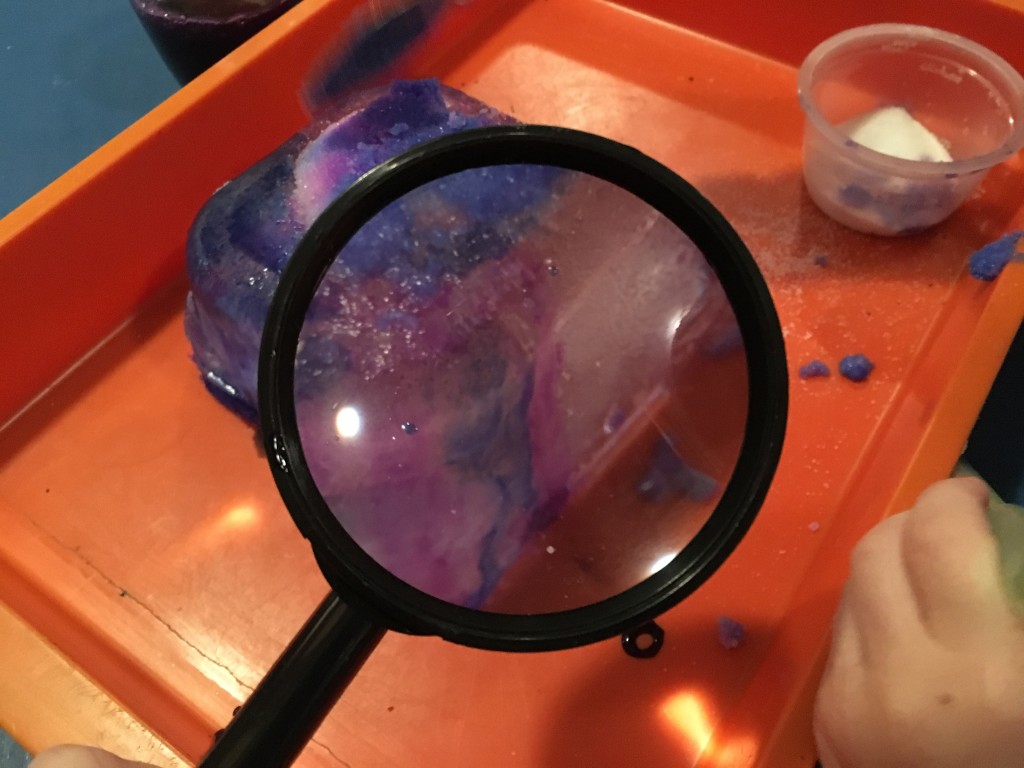
When we started to see the ice was melting, one of the children enthusiastically suggested we use magnifying glasses to look at the little holes that were being melted into the ice – a fantastic suggestion! Once the salt was turning into hard chunks, I offered spoons so that everyone could more easily poke at and dig up their salt formations.
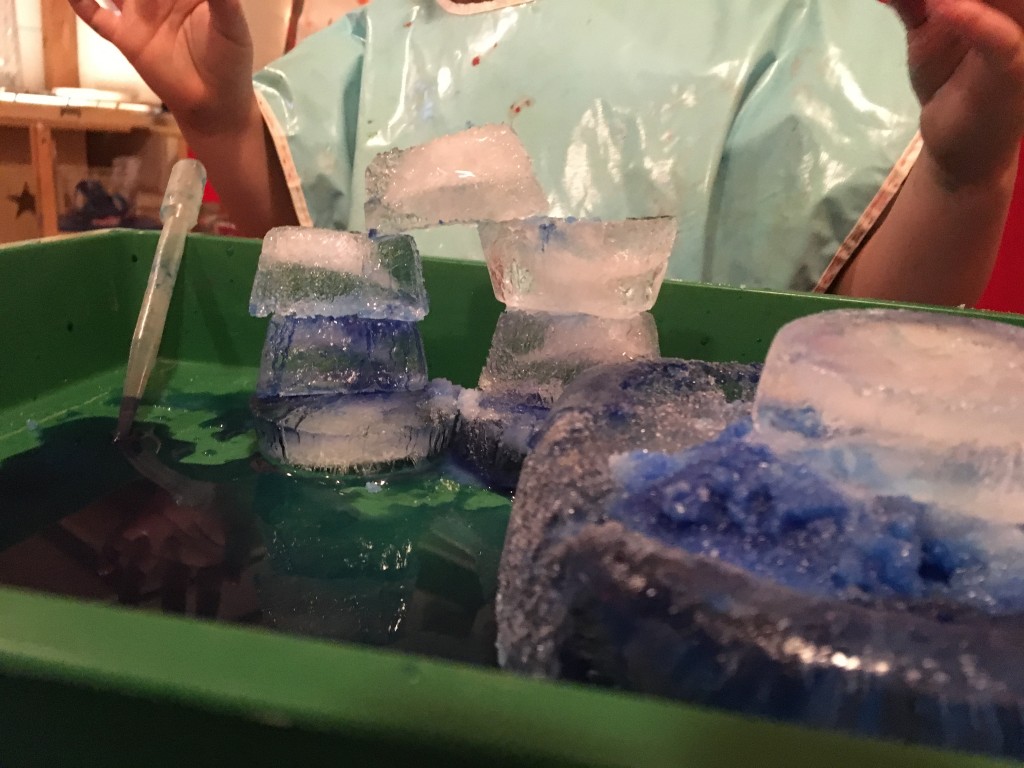
The other educator I share our class with had brought a tray full of ice cubes and a tray of “ice pucks” (made in something similar to a muffin pan) to add to our experiment. Once the children had been given time to explore with the big blocks of ice, I brought in the smaller pieces and divvied them up. The children showed excitement to have the small pieces on their trays, and some began using salt to build with the ice as I had explained could be done. There was a beautiful inukshuk created to “help friends find their way home”. There was also an accidental attachment of a spoon to an ice cube, frozen together as the spoon was randomly placed for a time on salted ice.
One thing that was a major component of both ice melting experiments was the strong desire the children shared to be able to save their work and “bring it home”. This is something that comes up when engaging in loose parts play, also. Some art is impermanent, and is meant to be enjoyed in the experience. Ice melts, and so, it could not be taken home as a permanent art piece. We chatted for a while in the second experiment about how we might save the projects. What about pouring the melted ice water into cups? Or quickly going home and putting the remaining ice in the fridge? At the end, we settled for taking pictures of our process.
However, as often happens in the magic of childhood, we came up with a new solution, to use the melted ice (which was now further diluted liquid watercolours) to paint with. We dipped paint brushes into the trays (as it happens, most of the children stuck to one or two colours on their ice blocks), and into the left over watercolours, and painted onto paper. The creations were beautiful to me. There’s just something so aesthetically pleasing about watercolour paintings.

So there you have it. Our experience trying the melting salt with ice experiment was a hit both times, even for my little one who enjoyed the activity twice. Considering the low cost of materials needed, ease to set up, and ample opportunities to learn and create in such an engaging way, I’d definitely recommend trying this salt & ice experiment with your children.
If you like what you found here, you can sign up here for my short and sweet weekly email notification to let you know what’s new on The Big To-Do List. I’d also love to connect with you on Twitter, Facebook, Instagram, and Pinterest. Make sure to say hello when you find me! (You can actually see a video of this experiment on my Facebook page.)
Disclosure: Affiliate link below

Do you have any more cool preschool science experiments to share with us? Please feel free to link to your own awesome experiment posts in the comments. I’m always looking for new things to try at home and at preschool.
Disclosure: This post contains affiliate links. This means that if you purchase through one of the links, I will make a small commission from the sale. You can even go right on to my own Amazon recommendations shop here. What a great way to get what you need and help support this blog, hey? You can view my full disclosure statement here.
One thought on “Melting Ice with Salt: A Cool Preschool Science Experiment”
Pingback: Slime Without Borax: Preschool Sensory Play Experience - The Big To-Do List